
So you built a kickass iOS app. You install it on your iPhone, play around with it, perform some basic manual tests and everything simply works! You feel on top of the world and you move forward with developing the next big feature of your app while hearing angels singing in the background.
An Angel Singing
Then it hits you like a ton of bricks. With each new feature you add — a whole lot of testings need to be done as well. More deployments to your device — more manual testing — more time spent on testings instead of enjoying life.
This is where Appium comes into play. Appium, in its creators own words, is an open-source tool for automating native, mobile web, and hybrid applications on iOS and Android platforms. In simple words: Appium allows you to create automated tests for your app using Python so you won’t have to test it manually yourself.
Now that you are all pumped up and excited for the future, It’s time to get Appium for iOS testing using an iPhone simulator up and running!
Installing Python Prerequisites
As exciting as it may be to fire up your favorite text editor and start writing amazing tests, we first need to install some modules that will help us (and Appium) with the automation.
First, make sure you have PiP installed on your system by typing pip -V into the command line. You should get a result similar to the following:
pip 9.0.1 from /Users/johnnyt/.py/lib/python2.7/site<span class="token punctuation">-</span>packages (python 2.7)If for some reason you don’t have pip installed, head over to https://pip.pypa.io/en/stable/installing/ for details on how to do so.
Next, create a folder to put all our tests and configuration files in, then create a text file named pip-reqs.txt containing all the packages we wish to install:
selenium==3.3.1
py==1.4.34
pytest==3.2.3
Appium<span class="token punctuation">-</span>Python<span class="token punctuation">-</span>Client==0.24
Why do we need these 4 packages you may ask?
- Selenium is a browser automation tool. We will use it to perform all kinds of actions in our tests.
- Pytest is a framework for writing tests in Python.
- Py is a dependency of pytest.
- Appium-Python-Client is a Python wrapper for Appium.
Install all the packages using the following command:
pip wheel <span class="token punctuation">-</span><span class="token punctuation">-</span>wheel<span class="token punctuation">-</span>dir wheelhouse <span class="token punctuation">-</span>r pip<span class="token punctuation">-</span>reqs.txtInstalling Appium
Appium is installed using NPM. Yap, its that easy.
npm install <span class="token punctuation">-</span>g appiumPreparing Your App for Appium
In order for your app to run in a simulator, it must be specifically compiled for that simulator. This is done using the xcodebuild command line tool inside the project’s folder. Let’s examine the following example:
xcodebuild <span class="token punctuation">-</span>workspace SuperAwesomeApp.xcworkspace <span class="token punctuation">-</span>scheme SuperAwesome <span class="token punctuation">-</span>sdk iphonesimulator11.1The command sets three required parameters for xcodebuild as follows:
- workspace: This parameter is simply the xcode’s workspace file name of your project.
- scheme: A scheme is basically a collection of commands for various targets, like Release or Test. To get a list of possible schemes for your project, simply type the following command inside your project’s folder:
xcodebuild <span class="token punctuation">-</span>list- sdk: This parameter specifies which SDK we are going to use when building the app. It can be the latest iOS SDK or it might as well be a specific version of watchOS. To get a list of available SDKs, simply type the following command inside your project’s folder:
xcodebuild <span class="token punctuation">-</span>showsdks⚠️ Please note: Since we wish to use a simulator for our automated tests, we should use the iphonesimulator SDK option when building our app.
Once ran, a new folder called .app will be created containing your app and its related elements (debug code etc.). If you didn’t change the default project values, the .app folder will be created under the following location:
~/Library/Developer/Xcode/DerivedData/<appname<span class="token punctuation">></span><span class="token punctuation">-</span>xxxxxxxxxx/Build/Products/debug<span class="token punctuation">-</span>iphonesimulator/⚠️ ** Please note**: xxxxxxx will be replaced by a random string.
Let the Testings Begin!
Now that we have everything installed, and our app compiled just the right way, let’s get testing!
Booting up the iPhone Simulator Using Appium
The basis to our automated testing is to have Appium boot up an iPhone simulator, deploy our app to it and finally run the app.
In the same folder you created in the Installing Python prerequisites step, create a new file named commonutils.py_ with the following code:
<span class="token keyword">from</span> appium <span class="token keyword">import</span> webdriver
<span class="token keyword">import</span> os

<span class="token keyword">def</span> <span class="token function">set_up</span><span class="token punctuation">(</span>self<span class="token punctuation">)</span><span class="token punctuation">:</span>
    d_caps <span class="token operator">=</span> <span class="token punctuation">{</span><span class="token punctuation">}</span>
    d_caps<span class="token punctuation">[</span><span class="token string">'platformName'</span><span class="token punctuation">]</span> <span class="token operator">=</span> <span class="token string">'iOS'</span>
    d_caps<span class="token punctuation">[</span><span class="token string">'platformVersion'</span><span class="token punctuation">]</span> <span class="token operator">=</span> <span class="token string">'11.1'</span>
    d_caps<span class="token punctuation">[</span><span class="token string">'deviceName'</span><span class="token punctuation">]</span> <span class="token operator">=</span> <span class="token string">'iPhone 7'</span>
    d_caps<span class="token punctuation">[</span><span class="token string">'app'</span><span class="token punctuation">]</span> <span class="token operator">=</span> os<span class="token punctuation">.</span>path<span class="token punctuation">.</span>abspath<span class="token punctuation">(</span><span class="token string">'/users/johnnyt/Projects/super-awesome-app/DerivedData/SuperAwesome/Build/Products/Debug-iphonesimulator/SuperAwesome.app'</span><span class="token punctuation">)</span>
    self<span class="token punctuation">.</span>driver <span class="token operator">=</span> webdriver<span class="token punctuation">.</span>Remote<span class="token punctuation">(</span><span class="token string">'http://localhost:4723/wd/hub'</span><span class="token punctuation">,</span> d_caps<span class="token punctuation">)</span>
Let’s analyze what this code does:
- The first two lines import packages our code will use.
- Line 5 creates an empty object called dcaps_ (short for desired caps) which will hold the simulator properties.
- Lines 6–8 defines the characteristics of the simulator: platform type (iOS), platform version (iOS 11.1 in this example, you can change it to whatever needed in your testing scenarios) and device name (corresponds to the simulator name in Xcode).
- Line 9 sets the path to the .app file we created in the previous step.
- Line 10 fires up the simulator with all the properties we set. Now let’s take the new setup method for a spin! Create another file named _basic_test.py and insert the following code:
<span class="token keyword">import</span> unittest
<span class="token keyword">import</span> time
<span class="token keyword">from</span> common_utils <span class="token keyword">import</span> set_up

<span class="token keyword">class</span> <span class="token class-name">BasicTest</span><span class="token punctuation">(</span>unittest<span class="token punctuation">.</span>TestCase<span class="token punctuation">)</span><span class="token punctuation">:</span>
    test_name <span class="token operator">=</span> <span class="token string">'BasicTest'</span>
    driver <span class="token operator">=</span> <span class="token boolean">None</span>

    <span class="token keyword">def</span> <span class="token function">test_basic_test</span><span class="token punctuation">(</span>self<span class="token punctuation">)</span><span class="token punctuation">:</span>
        set_up<span class="token punctuation">(</span>self<span class="token punctuation">)</span>
It’s quite simple to understand whats going on in here:
- Line 3 — imports the setup_ method from the commonutils.py_ file we created previously.
- Line 5 — defines a new class called BasicTest which takes a unittest.TestCase as parameter, indicating this is, well, a test case function.
- Lines 6–7 creates 2 variables: testname_ which holds a string representing the test (we will use that later) and driver, which holds the web driver object.
- Line 9 defines a function called testbasictest which is, in a real world use case, a test. In this simple example the only thing this test does is opening a new instance of the simulator as define in the set_up method we created earlier.
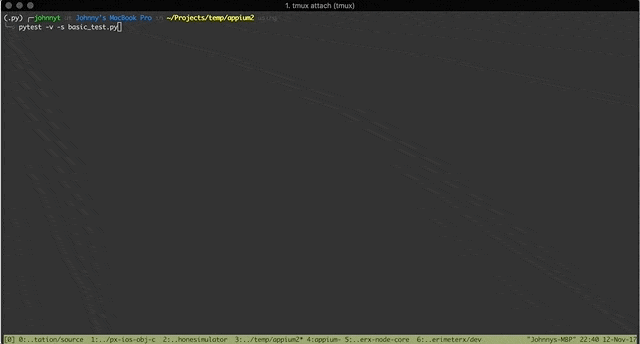
We are now ready to run our first test! Open your favourite terminal app and run appium server by simply typing appium and press enter. If all goes well you should see something similar to this:

Next, open another terminal window and run the test by typing the following:
pytest <span class="token punctuation">-</span>v <span class="token punctuation">-</span>s basic_test.pyA few seconds will go by and if the gods are smiling upon us a new iPhone simulator running our app will pop up and the test will pass.
Yay Appium o/
Where to go from here?
If you take a look at the command line right now you would see that the simple test we created passed. This is because we didnt really test anything, we just told Appium to open a simulator and since it did it so gracefully — our test is considered a success.
A more useful test would be, for example, testing the login flow of our app. How would we go about do that you may ask? Well, the plan is as follows:
- Grab the email text field using its id.
- Clean it up
- Write an email of a user we know exists and can login.
- Gran the password text field using its id.
- Write the password for that user.
- Grab the Login button using its id.
- Click on the Login button.
- In my sample app once the user logs in, a new page renders that features a logout button. If the login is successful then we should be able to grab that logout button by its id, thus knowing a successful login was performed.
A Man With a Plan
Now that we know what needs to be done, let’s get started.
In order to easily grab the fields and button we need to give them an id. In Xcode click on the login button and the email and password fields, switch to the Identity Inspector enter an identity under the Accessibility options:
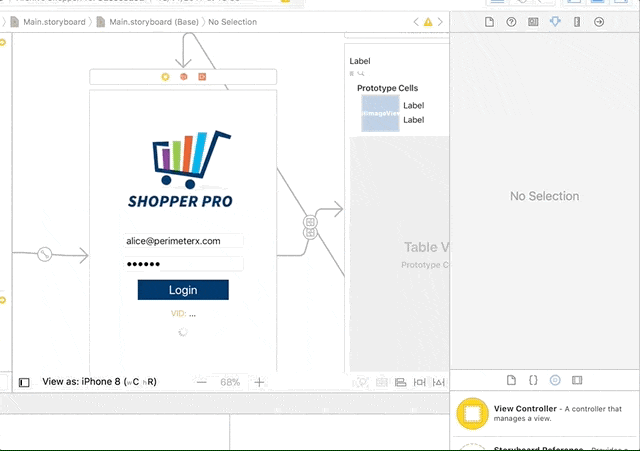
Adding an ID to the email field
At this point you will need to rebuild the app (as explained in the Preparing Your App for Appium section) so that Appium will be able to use the new ids.
Next, open the basictest.py_ file and add the following code inside the testbasictest method so it will look as follows:
<span class="token keyword">def</span> <span class="token function">test_basic_test</span><span class="token punctuation">(</span>self<span class="token punctuation">)</span><span class="token punctuation">:</span>
    set_up<span class="token punctuation">(</span>self<span class="token punctuation">)</span>
    email <span class="token operator">=</span> self<span class="token punctuation">.</span>driver<span class="token punctuation">.</span>find_element_by_name<span class="token punctuation">(</span><span class="token string">"emailField"</span><span class="token punctuation">)</span>
    email<span class="token punctuation">.</span>clear<span class="token punctuation">(</span><span class="token punctuation">)</span>
    email<span class="token punctuation">.</span>send_keys<span class="token punctuation">(</span><span class="token string">"[email protected]"</span><span class="token punctuation">)</span>
    self<span class="token punctuation">.</span>driver<span class="token punctuation">.</span>back<span class="token punctuation">(</span><span class="token punctuation">)</span>
    password <span class="token operator">=</span> self<span class="token punctuation">.</span>driver<span class="token punctuation">.</span>find_element_by_name<span class="token punctuation">(</span><span class="token string">"passwordField"</span><span class="token punctuation">)</span>
    password<span class="token punctuation">.</span>clear<span class="token punctuation">(</span><span class="token punctuation">)</span>
    password<span class="token punctuation">.</span>send_keys<span class="token punctuation">(</span><span class="token string">"1234567"</span><span class="token punctuation">)</span>
    self<span class="token punctuation">.</span>driver<span class="token punctuation">.</span>find_element_by_name<span class="token punctuation">(</span><span class="token string">"loginBtn"</span><span class="token punctuation">)</span><span class="token punctuation">.</span>click<span class="token punctuation">(</span><span class="token punctuation">)</span>
    time<span class="token punctuation">.</span>sleep<span class="token punctuation">(</span><span class="token number">5</span><span class="token punctuation">)</span>
    self<span class="token punctuation">.</span>driver<span class="token punctuation">.</span>find_element_by_id<span class="token punctuation">(</span><span class="token string">"logoutBtn"</span><span class="token punctuation">)</span>
Let’s analyze the code:
- Line 2 —setup the simulator itself (look up above if you forgot how its implemented)
- Line 3 — the driver object is the key to all the interaction we are going to do with the simulator. One key function it exposes is findelementbyname()_. This function takes a string parameter (name) and looks for an element by that name in the currently displayed view. If it finds the element it will return an object that will allow us to interact with the element. In our case we wish to find the email field (we setup earlier).
- Lines 4–5 — using the email object we fetched in line 3 we can now interact with the email text field. Line 4 clears up any text that the field might have and line 5 enters an email address.
- Line 6 — The back() function simply takes us one step back. In our case it closes the keyboard.
- Lines 7–9 — Same as lines 3–5 but for the password field.
- Line 10 — Using the same findelementbyname()_ function of the driver object we grab the login button. Once grabbed, we use the click() function to click it (big surprise here ha?)
- Line 11 — The sleep() method allows us to specify a number of seconds to wait for an operation to happen. In our case we wait 5 seconds for the login process to finish, and the next page of the app to show.
- Line 12 — This is the heart of the test. This line looks for the log out button (using the same findelementbyname()_ function as before). If found — the test passes, if not — it fails.
Let’s see this test in action:
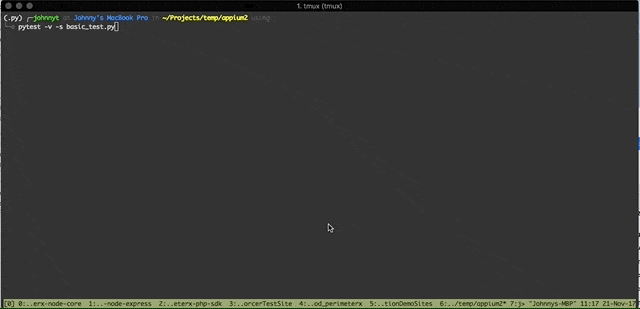
A passing test
And there you have it. A fully working test that actually tests something useful! From here on out — the world is your oyster. Take what you learnt here and go have fun with automated tests.
Special thanks to Noy Mizrahi for helping me with this post!